You can now connect your DAP-Powered membership site to your favorite marketing platforms in real time and fully automate it in a matter of minutes!
DAPConnect will allow you to automate your marketing campaigns with your membership site.
Checkout this video for more details:
Installation Steps
STEP 1: Upgrade DAP to version 5.1.0 (BETA)
To use DAPConnect, you need to upgrade DAP to v5.1.0 and LiveLinks to v2.0.3.
1. Existing DAP Installation
Here’s the steps to upgrade DAP from your current version to v5.1.0:
Download DAP v5.1.0 and LiveLinks v2.0.3 zip files from your members’ area .
a) You can use the DAP Easy Installer plugin to upgrade DAP to v5.1.0 and LiveLinks to v2.0.3.
-OR-
b) If the easy installer does not work due to permission issues on your server, you can use FTP to upload the files:
=> Download LiveLinks v2.0.3 zip file from your members’ area on our site, unzip it and upload it to the WP plugins folder on your site (/wp-content/plugins) overwriting the existing DAP-WP-LiveLinks folder.
=> Download DAP v5.1.0 zip file from your members’ area on our site, unzip it and upload it to the root folder on your site overwriting the existing contents of “dap” folder.
Do NOT delete the “dap” folder.
After uploading the files, log in to the DAP admin dashboard to complete the upgrade.
2. New DAP Installation
Install DAP v5.1.0 (beta) & LiveLinks v2.0.3.
You can use the DAP Easy Installer plugin (or use regular FTP) to install DAP.
————————————————————————
STEP 2: Install DAPConnect
- Download the dapconnect_v1.0.zip from your members’ area.
![]()
2. Extract the contents of the zip file.
Upload the dap folder to the “root” folder of your site overwriting the contents of your existing dap folder.
![]()
That’s it.
Zapier Integration
DAPConnect fully supports Zapier integration. You can connect your favorite ZAPs with DAP in no time. But with DAPConnect, you can integrate your marketing platforms with DAP – with or without Zapier!
Let me take you inside the world of DAPConnect!
There are 2 ways in which you would want to connect external systems to DAP.
Inbound Connection:
![]()
Your subscribers are added to the external system first and you want them added to DAP automatically and in real time.
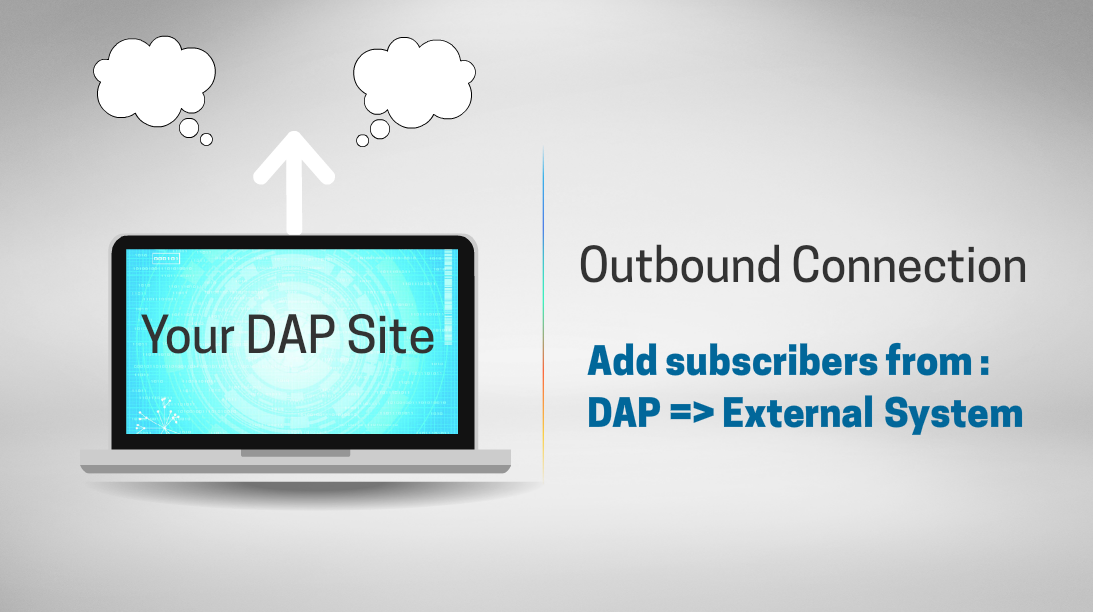
Outbound Connection:
![]()
Your subscribers are added to DAP first and you want them added to the platform of your choice automatically and in real time.
DAPConnect will allow you to do both.
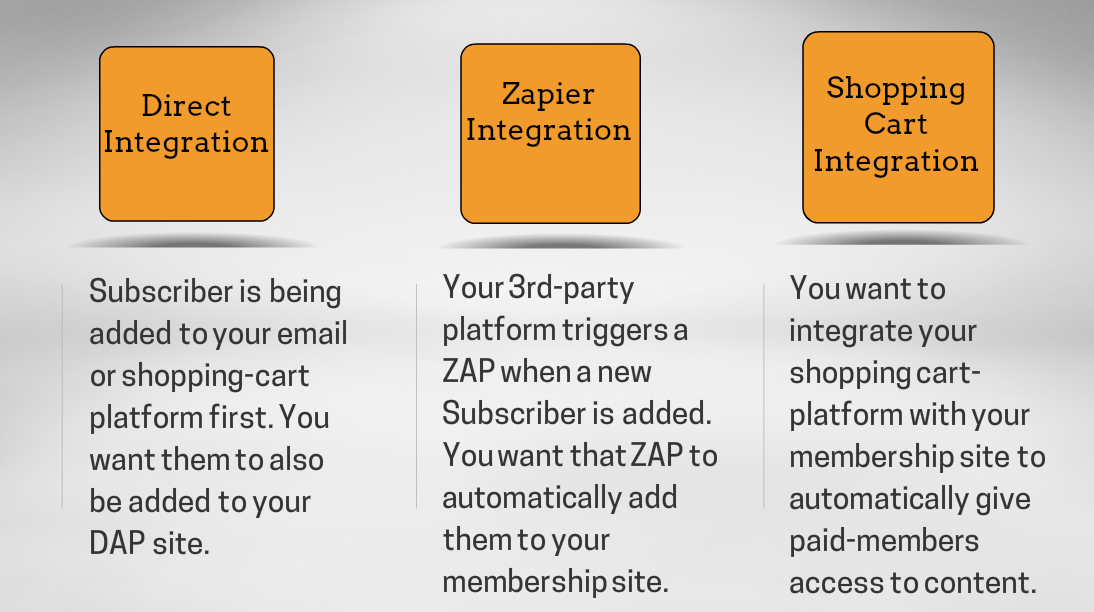
Types of Inbound Integration
There are 3 different ways in which you can achieve this integration.
![]()
1. Direct Integration from an external system to DAP
For e.g. – Your favorite Email Platform => DAP
Checkout this video for more details on the integration.
Direct Integration Steps
STEP 1: Set the DAPConnect URL
http://YOURSITE.com/dap/dapconnect.php?productId=[YOUR DAP PRODUCT ID]&secretKey=[YOUR SECRET KEY]&redirect=[YOUR REDIRECT URL]
For e.g.
http://YOURSITE.com/dap/dapconnect.php?productId=1&secretKey=COOLBEANS&redirect=/my-content
STEP 2: Complete Data Mapping
- Visit DAP Admin => Setup => Data Mapping page
- Map the field names that your marketing platform is sending to the field names that DAP can understand. Please see the section below to find out “how-to figure out the field names that your marketing platform sends in the HTTP Post Notification”.
2. Zapier Integration
Zapier’s allows you to connect your apps. You pick two different apps, and when something happens in one app—say, when you receive a new message in your email app—it automatically does something in the other app. For e.g. it’ll send you a SMS about your email or save that message to your notes app. You can do almost anything automatically when your apps work with Zapier.
Now you can use the power of Zapier to automate your DAP powered membership site in many different ways.
You can use existing ZAPs and integrate it with DAP. Setup action triggers to notify DAPConnect whenever a new subscriber event is triggered in one of your ZAPs.
For ex:
ConvertKit is a very popular email marketing platform and it has a “new subscriber” ZAP. You can setup an action trigger to notify DAP whenever a new subscriber is added to your ConvertKit list. This way the subscriber will be added to your DAP powered membership site automatically.
More and more marketing platforms are building Zapier support as this allows their customers to connect their favorite platforms. And now… you can connect your favorite platforms with DAP using Zapier!
Zapier Integration Steps
STEP 1: Setup the DAPConnect URL as your Action URL in Zapier
http://YOURSITE.com/dap/dapconnect.php?productId=[YOUR DAP PRODUCT ID]&secretKey=[YOUR SECRET KEY]
For e.g.
http://YOURSITE.com/dap/dapconnect.php?productId=1&secretKey=COOLBEANS
STEP 2: Complete Data Mapping
- Visit DAP Admin => Setup => Data Mapping page
- Map the field names that your marketing platform is sending to the field names that DAP can understand. Please see the section below to find out “how-to figure out the field names that your marketing platform sends in the HTTP Post Notification”.
How to Figure Out the Field Names in the HTTP Request
1. Use the DAP Log
You can find the field names that your marketing platform sends out in the DAP Admin => System => Logs. Please follow these steps to enable logging.
- Set DAP Admin => Setup -> Config -> Log Level to “Log All Activity”
- Visit DAP Admin => System => Logs => Empty Log Content
- Now signup using the Signup Form you generated in your Marketing Platform.
- Check the contents of the DAP log to find out the field names that your marketing platform is sending out in the HTTP POST Request.
- Now visit DAP Admin => Setup => Data Mapping Page and set up data mapping. The goal of data mapping is to map the field names that you get from your marketing platform to the names that DAP understands
Watch this video to see how to figure out the field names that your marketing platform sends to 3rd party systems like DAP.
2. Use RequestBin to Inspect the Requests
You can use an app like Requestb.in to inspect the field names in the request header.
Requestb.in doesn’t try to interpret the payloads, it just prints them to your screen as it receives them, making it easy to see what is going on.
http://requestb.in/38a2kao3
- Now signup using your sign up form. It”ll trigger a notification to the requestb.in url that you entered in the settings. After you do that, simply refresh your Requestb.in page and take a look.
- You’ll find the field names and format in which the data is being sent by your marketing platform.
====================================================================
2 Types of Outbound Integration
Your subscribers are added to DAP first and you want them added to the platform of your choice automatically and in real-time.
You can send subscriber data from DAP to external systems in 2-ways.
1. Send subscriber details from DAP to the configured 3rd party URL
2. Send subscriber details from DAP to your ZAP
DAPConnect can be configured to send out subscriber and order details to any configured 3rd party URL.
You can send Webhook notification to:
- Your ZAP URL
- Your own php script
- URL of a partner site
- URL of ANY 3rd party site
The following events in DAP will trigger a DAPConnect Webhook notification:
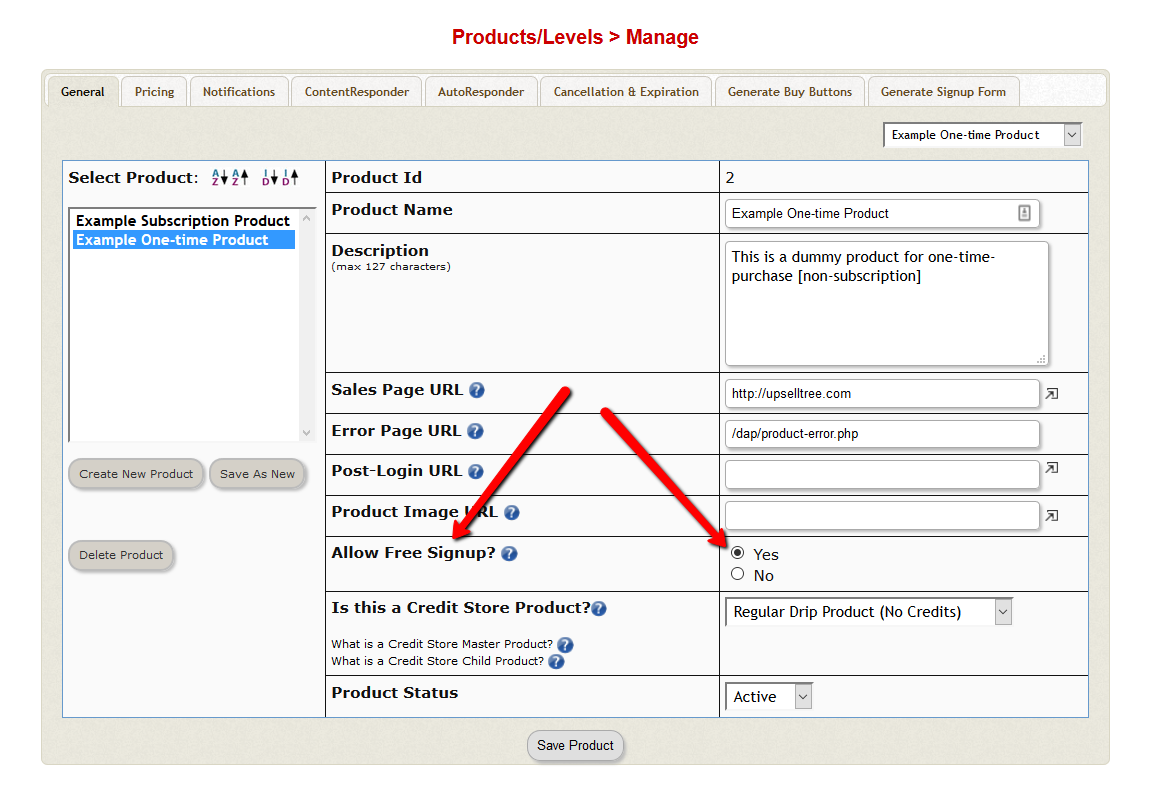
=> NEW User Registration (paid or free)
=> User loses access to product (due to cancellation/refund etc)
The configuration is similar in both cases.
New User Registration Webhook:
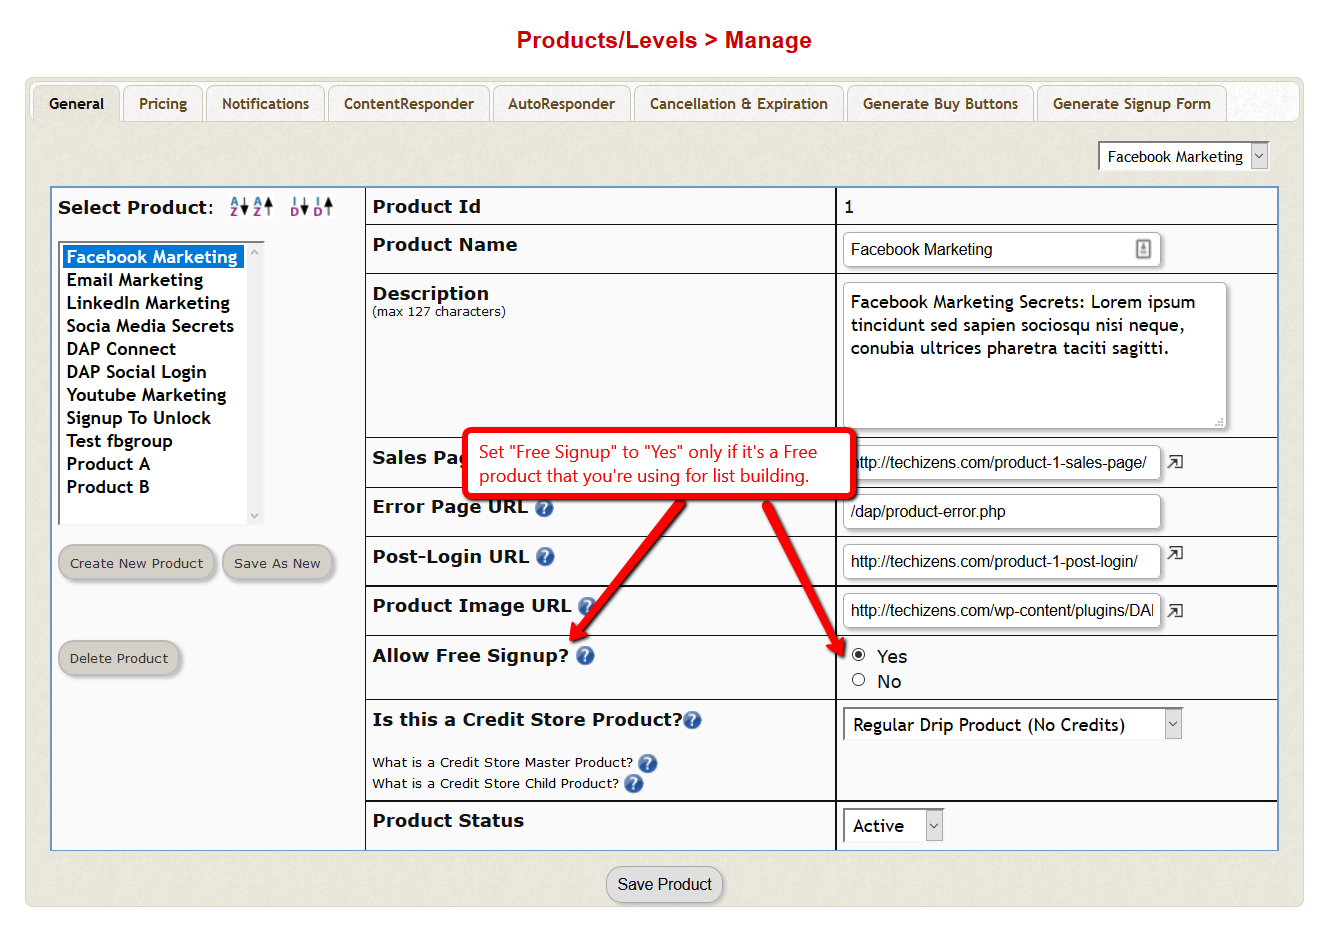
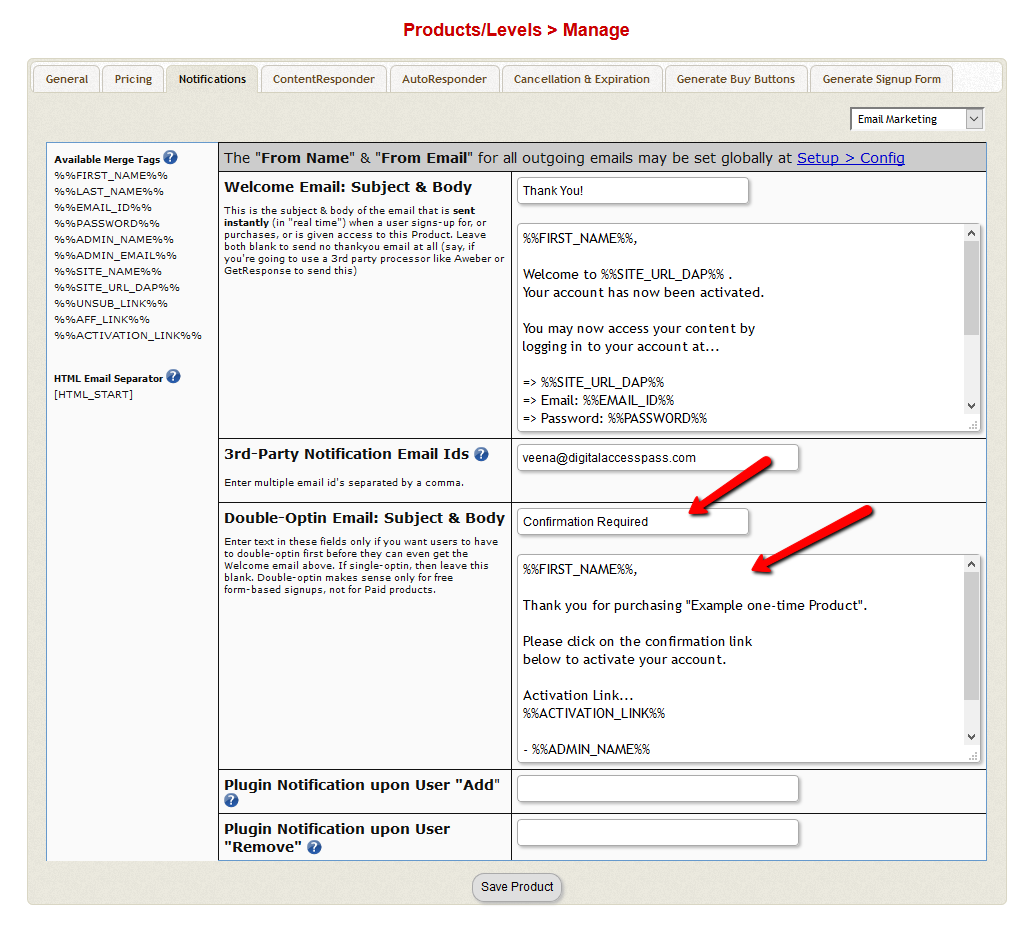
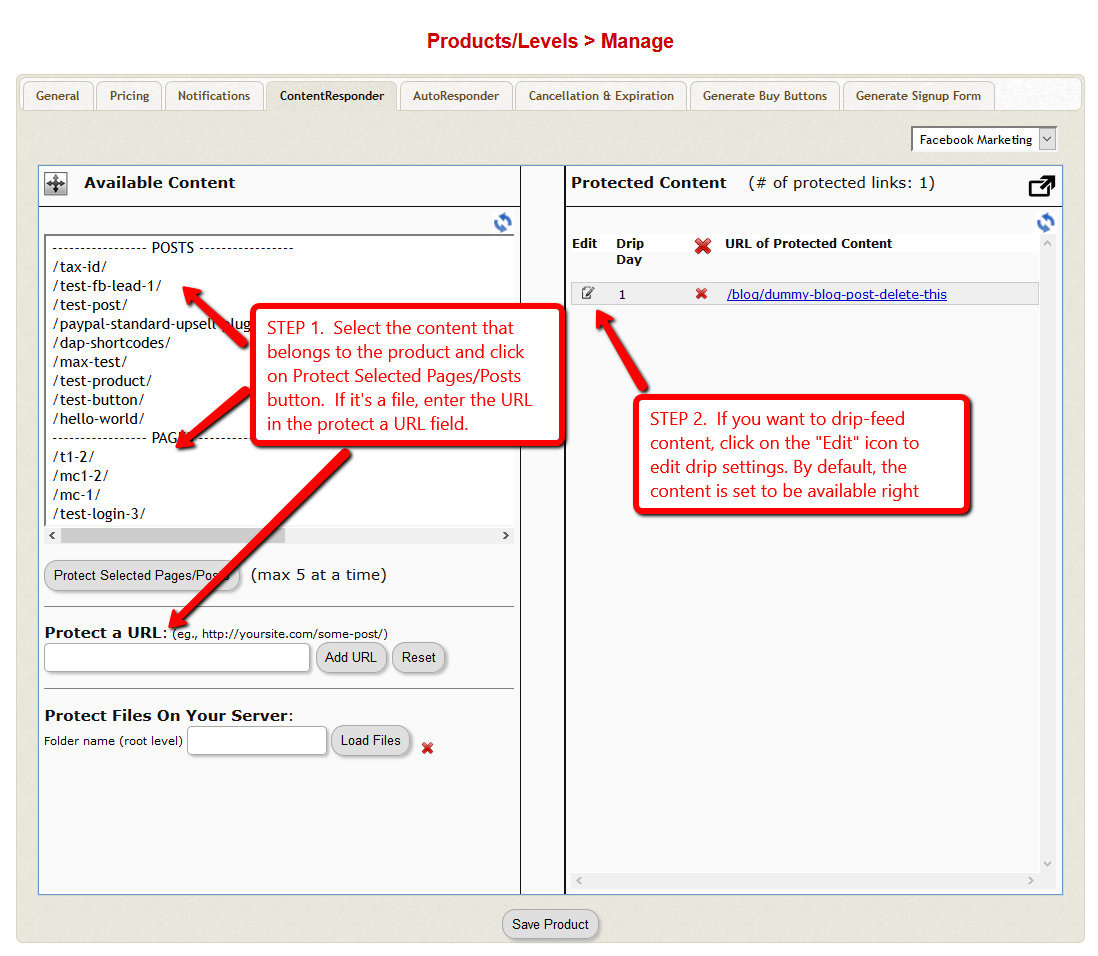
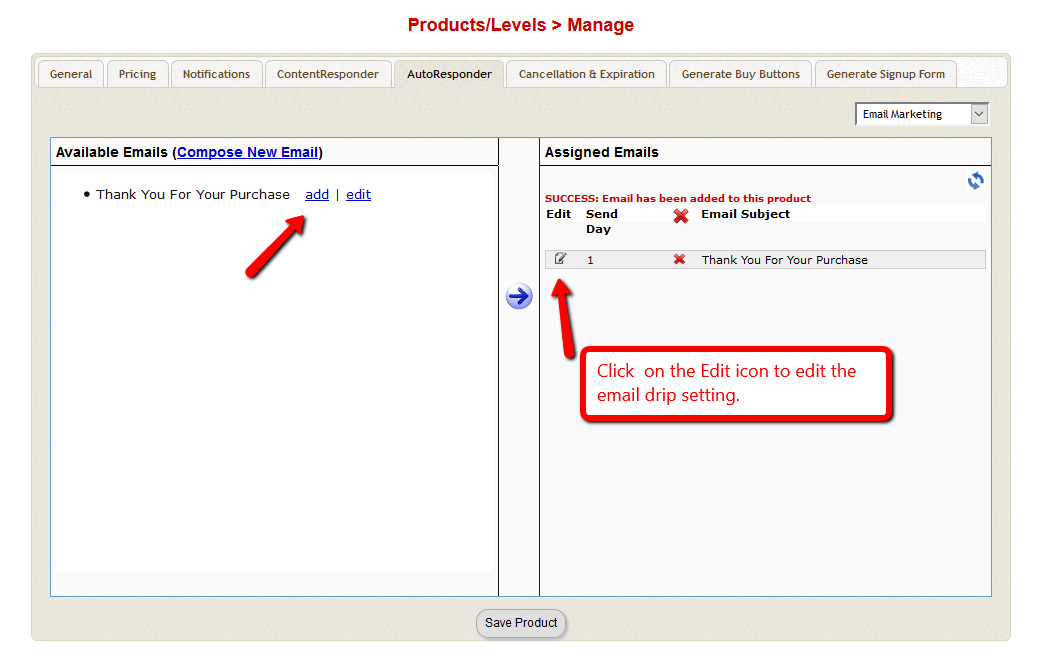
Visit DAP Admin => Products/Levels Manage Page => Notifications Tab
To receive NEW user registration notification, enter a string in that textbox in this format in the Plugin Notification upon User “Add” field.:
dapconnect:[PROTOCOL]:[URL Of Your Script]:[SendTransactionDetails]
PROTOCOL] : http or https
[URL Of Your Script] : Enter the URL of your script that should receive the http post from DAPConnect. It could be your ZAP URL or URL of your php script that can process the HTTP request from DAPConnect.
For e.g. YOURSITE.com/processresponse.php
NOTE: Do not use http or https in front of the domain name
[SendTransactionDetails] : Y or N (set to Y if you want dap connect to send out order details)
Here’re a few examples:
dapconnect:http:techizens.com/webhookhandler.php:Y
dapconnect:https:techizens.com/handler/processresponse.php:Y
===========================================================
Cancellation Webhook
Visit DAP Admin => Products/Levels Manage Page => Notifications Tab
To receive notification when a user loses access to a product in DAP, enter a string in that textbox in this format in the Plugin Notification upon User “Remove” field:
dapconnect:[PROTOCOL]:[URL Of Your Script]
[PROTOCOL] : http or https
[URL Of Your Script] : Enter the URL of your script that should receive the http post from DAPConnect. It could be your ZAP URL or URL of your php script that can process the HTTP request from DAPConnect.
For e.g. YOURSITE.com/processresponse.php
NOTE: Do not use http or https in front of the domain name
[SendTransactionDetails] : Y or N (set to Y if you want dap connect to send out order details)
Here’re a few examples:
dapconnect:http:techizens.com/webhookhandler.php
dapconnect:https:techizens.com/handler/processresponse.php
====================================================
Just configure the URL to which the data should be sent and DAP connect will do the rest.
DAPConnect Webhook Format:
‘first_name’ => First Name
’email’ => Email Id
‘action’ => “REGISTRATION” OR “CANCELLATION”
‘txn_id’ => Transaction Number
‘txn_type’=> Transaction Type
‘productId’ => DAP Product Id
‘orderDetails’ => [ARRAY] – only sent for a new purchase order of a paid product
‘fields’ => [ARRAY]
Format of the ‘fields’ Array:
‘last_name’ => Last Name
‘address1’ => Address1
‘city’ => City
‘state’ => State
‘zip’ => Zipcode
‘country’ => Country
Format of the ‘orderDetails’ Array:
‘txn_id’ => Transaction Number
‘txn_type’=> Transaction Type
‘payment_status’ => Payment Status
‘currency’ => Payment Currency
‘mc_gross’ => Payment Amount
‘payer_email’ => $tr->getPayer_email();
‘payment_processor’ => Payment Processor
‘item_number’ => Product Id
‘coupon_id’ => Coupon Id
Click here to download an example PHP “Webhook Handler” script.
Now… DAP connect can ONLY send out the data to the configured URL. After that it’s up to you in terms of how you want to process it. You need to write your own webhook handler to process that data, or use ZAP to send it to another app or take different action based on order type etc.
You can process the data and take whatever action you need. DAP will send out all “new subscriber” details to the configured URL – including FREE and PAID subscriber details.